
How to Use a Nail Drill for Beginners: A Step-by-Step Guide
A practical beginner guide to choosing bits, practicing control, and using a nail drill across nail types.
Introduction
First time using a nail drill? Choosing a bit, finding the right area to work on, and controlling pressure can all feel unfamiliar. A mismatched bit or heavy pressure may cause heat, damage a nail, or injure nearby skin.
Start with a clear task and practice on a secured nail tip. Once short, light passes feel steady, move to a real nail. Keep the bit moving, pause to check your progress, and stop if you feel heat, pain, or discomfort.
Before You Start: Choose the Right Bit for Your Task
Choose a bit for the material and task. Check its purpose, shape, and grit together. Bits made from carbide, ceramic, or diamond may look similar but serve different purposes, so shape alone is not enough to make a choice.
| Task | Bit to look for | Check before use |
|---|---|---|
| Shape acrylic | A rounded-top barrel bit made for acrylic shaping. | Check material and grit. Keep contact on the acrylic layer. |
| Shape a gel enhancement | A rounded-top barrel bit made for that gel product. | Identify the gel type before choosing a bit. |
| Refine product near nail edges | A small, fine, rounded-top detail bit made for that product. | Keep the product in view and avoid nearby skin. |
| Lightly prepare a natural nail, if needed | A fine sanding band on a mandrel, or another bit made for natural-nail preparation. | Confirm its intended use and avoid repeated passes over one spot. |
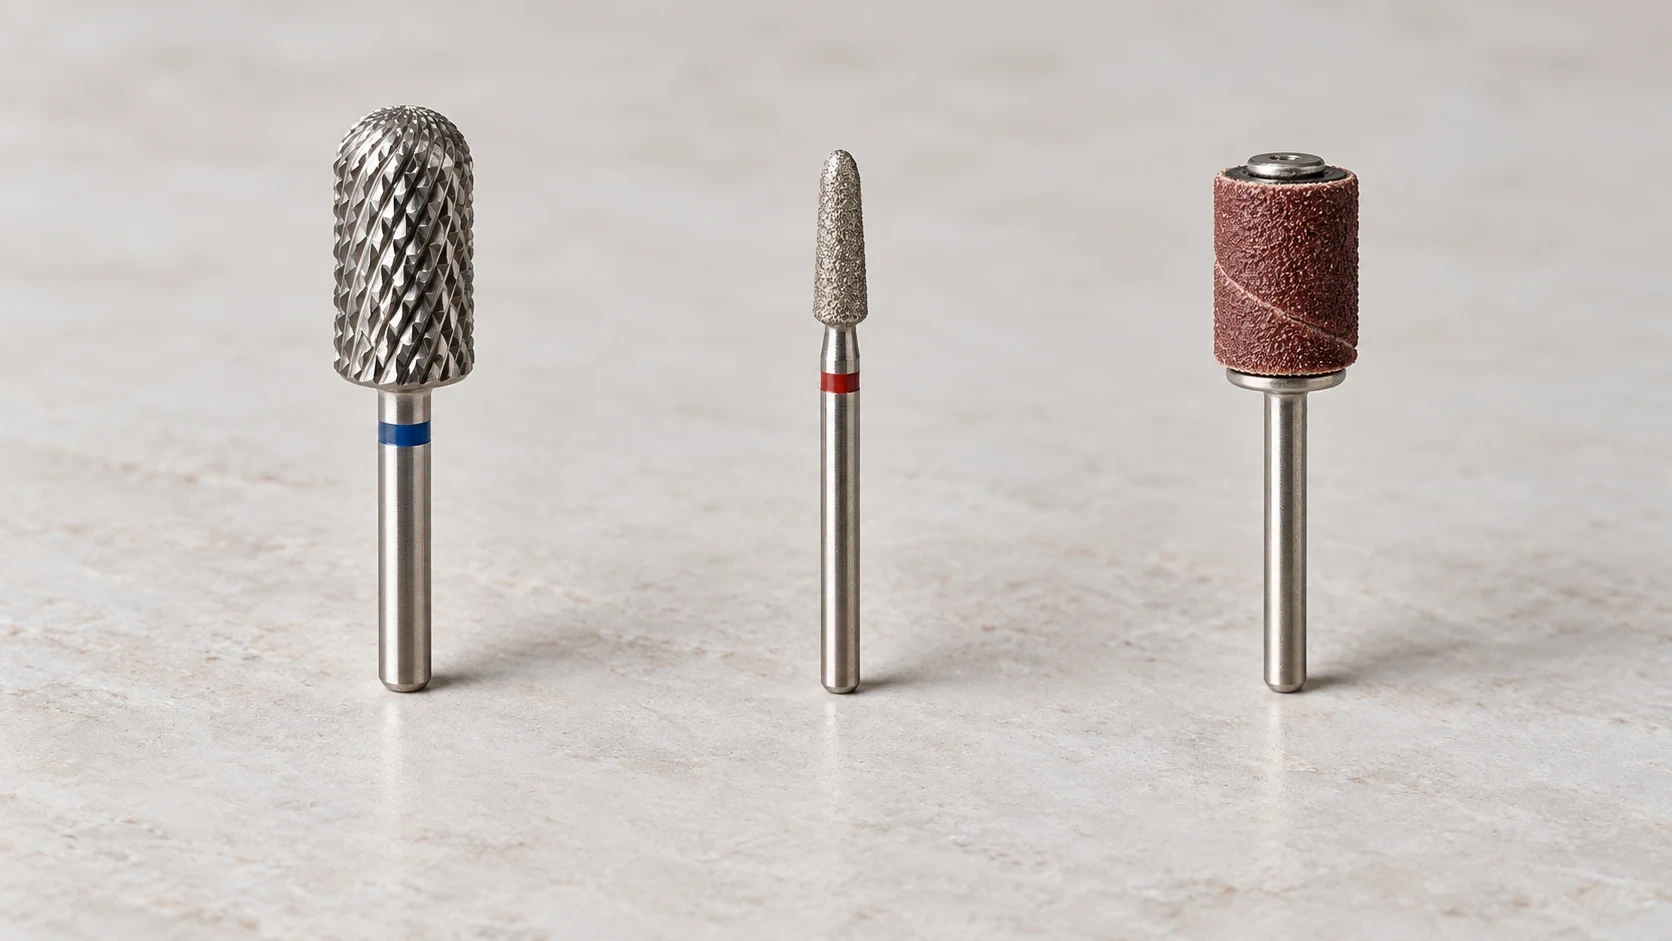
Left to right: barrel bit, detail bit, and sanding band on a mandrel.
A barrel bit covers a wider area of product. A smaller detail bit makes narrow areas easier to see. Grit describes how quickly a bit removes material. Fine grit works more gradually than medium or coarse grit, but a fine bit is not automatically suitable for natural nails.
RPM means revolutions per minute. A higher setting can remove material faster, leaving less time to correct poor placement or pressure. Forward and reverse change rotation direction. Choose a direction supported by the bit and check that you can guide it steadily on a practice tip.
Choosing a drill to use with your bits? Compare controls and bit compatibility across Jimdoa’s nail drill range.
How to Use a Nail Drill: Step by Step
Secure a practice nail tip to a stable holder. If possible, coat it with the type of product you plan to work on. Practice Steps 3 to 5 there before moving to a real nail in Step 6.
Step 1: Prepare Your Nails and Workspace
Check the nail and surrounding skin. Leave painful, irritated, or broken areas alone. Clean and dry your hands, then place supplies within easy reach. Set up a stable table, clear lighting, ventilation, and dust collection. Fix the practice tip to its holder so it will not shift.
Step 2: Install and Secure the Correct Bit
Switch off the drill and wait until it stops. Open the handpiece lock, insert the chosen bit straight into the opening, and close the lock. Check for looseness or a tilted bit before switching on.
Step 3: Set Up the Drill
Connect power or check the battery. Find the power, speed, and direction controls. Hold the bit clear of your hands, the table, and the practice tip. Start at a low setting you can control. Watch for uneven spinning or unusual vibration. If either occurs, switch off the drill and check the bit installation.
Step 4: Check the Rotation Direction
Find the direction control, often marked F/R, forward/reverse, or with arrows. Some bits work in one direction; others work in both. Select a direction supported by your bit.
On the middle of the practice surface, make one short pass with light contact, then lift the bit. Notice whether it moves smoothly or pulls, catches, or skips. If the bit supports both directions, stop the drill, switch direction, and repeat the pass elsewhere on the tip. Use the direction you can guide more steadily. Lift away and stop the drill before changing direction.
Step 5: Practice Your Grip and Hand Support
Hold the handpiece like a pen, without gripping tightly. Rest part of your working hand on the table and keep the practice tip steady. Make several short passes across its coated surface. Touch lightly, move your hand and the bit together, then lift away before repositioning.
If light contact does little to the practice material, check the bit and setup instead of pressing harder. Move to a real nail once you can repeat short passes without the bit catching or jumping.
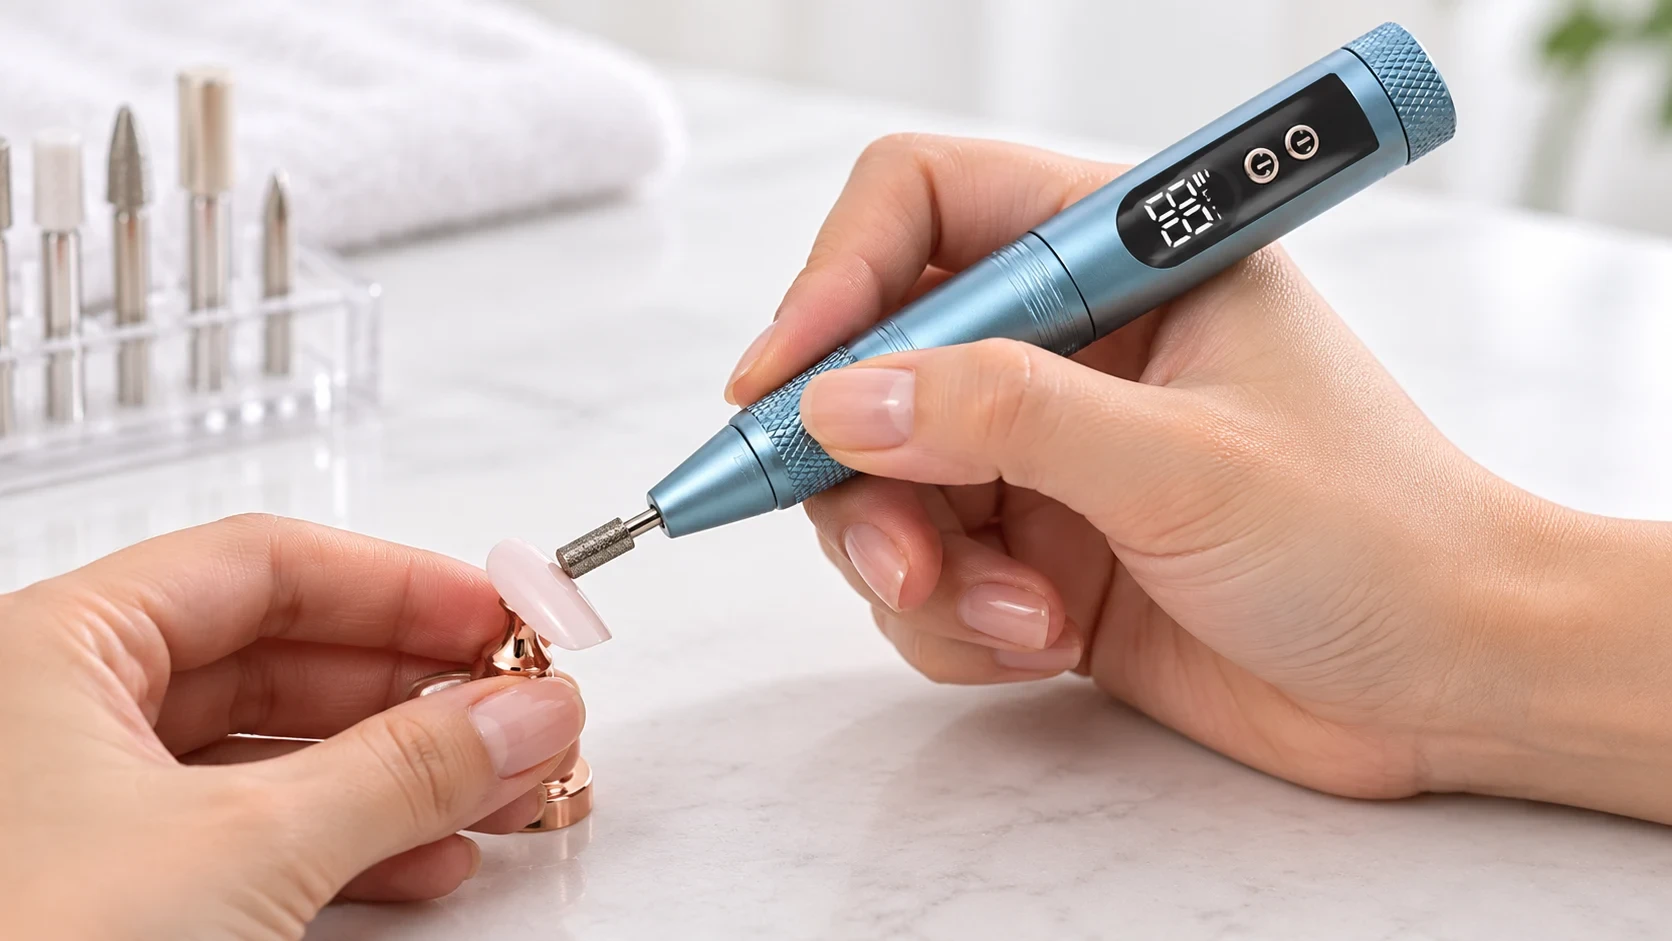
Practice your grip and hand support on a secured nail tip.
Step 6: Work on the Correct Area with Light, Moving Contact
Support the finger and position it so the contact area stays visible. For an enhancement, work on the product layer. If natural-nail preparation is part of the task, limit contact to the required area.
Use short, steady passes with light pressure. Lift away after each pass before changing position. Avoid holding a spinning bit in one spot or letting it reach nearby skin. If the finger moves or your view is blocked, lift away before continuing.
Step 7: Pause and Inspect Your Progress
Pause often enough to see what remains. Lift the bit, stop the drill, and clear loose dust from the nail.
Stop working on an area if the product becomes thin, its edge is hard to identify, or you feel heat, pain, or discomfort. Do not keep filing just to remove the last visible trace of product. Switch off the drill before changing bits.
Step 8: Finish the Nail Service
Once the nail reaches the intended shape or preparation stage, lift the bit and switch off the drill. Remove loose dust, check the surface, and continue with the next step of the service.
How to Adjust Your Technique for Different Nail Types
Different nail surfaces call for different contact areas and stopping points. Keep contact on the material you intend to work on. If the boundary between product and natural nail is unclear, stop and inspect.
Natural Nails
If light preparation is needed, choose a bit made for natural nails and work only on the necessary area. A bit used to reduce thick enhancement product is unsuitable for exposed natural nail. Stop if the nail feels hot or sensitive.
Gel Polish and Gel Enhancements
Gel polish forms a thin coating. Check the product’s removal method before using a drill. Some methods involve working on the top coat before soaking, but that does not mean filing through the color to reach natural nail.
Gel enhancements form a thicker layer that can be shaped. When removing one, check whether the product is soak-off gel or hard gel. Soak-off products may soften after surface preparation; hard gel does not come off through soaking. “Builder gel” alone does not identify which type you have.
Acrylic Nails
Shape or reduce the acrylic layer. Product may be thinner near the sidewalls and newly grown nail, so watch those areas closely. Exposed natural nail is outside the acrylic layer you are shaping.
Common Mistakes and Warning Signs
If control changes or something feels wrong, lift the bit first. Stop the drill before checking the bit or adjusting a setting.
| Mistake or warning sign | What you may notice | What to do |
|---|---|---|
| Too much pressure | You need force to remove material, or a groove appears. | Lift away. Check the bit choice and resume only with light contact. |
| Staying in one spot | Heat or a visible mark develops. | Stop and let the area cool. Leave a hot or sensitive spot alone. |
| Catching or skipping | The bit pulls, jumps, or catches an edge. | Stop. Check the bit, direction, and hand support on a practice tip. |
| Unusual vibration | The handpiece vibrates strongly, or the bit spins unevenly before contact. | Switch off. Check that the bit sits straight and is locked. Avoid using it if the problem remains. |
| Pain or burning | The nail or nearby skin hurts during or after contact. | Stop working on that nail. |
| Skin injury | A scrape, cut, or bleeding appears. | Stop working on that area and keep the bit away from injured skin. |
How to Clean and Store Your Nail Drill
Switch off the drill, disconnect power or the charging cable, and wait for the bit to stop. Remove the bit from the handpiece. Take any used sanding band off its mandrel.
Disposable sanding bands: Discard the used band and fit a fresh one next time. Its porous surface can retain debris, so washing it for reuse is unsuitable.
Reusable bits and mandrels: Brush away visible dust and product. Wash metal parts that are designed for water cleaning with a small brush, soap, and warm water, then rinse. Clean other materials using a suitable method. Disinfect cleaned parts with a compatible product for the contact time stated on its label. Let each part dry fully before storing it in a clean, dry case.
Handpiece and drill body: Wipe dust from exterior surfaces with a soft cloth. Use a cleaning product suitable for your model, keeping liquid out of openings, vents, and charging ports. Do not immerse the machine. Store it where the handpiece and cable will not be crushed or knocked.
Conclusion
A good result comes from controlled passes, not from trying to finish quickly. Choose a bit for the material, practice before working on a real nail, and inspect the surface as you go. Light contact and steady movement help you stay in control. When the product boundary becomes unclear or a nail feels uncomfortable, pause and reassess.
Explore Nail Drills for Your Work
Once you know your tasks and workspace needs, compare Jimdoa’s nail drill models by format and power source. The range includes pen-style, portable, and workstation options, making it easier to narrow down a suitable setup.
Frequently Asked Questions
Should I Use My Nail Drill in Forward or Reverse?
Choose a direction supported by the bit that feels steady for your movement. If both directions are supported, compare them on a practice tip. Stop the drill before switching.
What Order Should I Use Nail Drill Bits In?
There is no fixed order for every service. Choose a bit for the current material and task, then change it when the task changes. A coarse-to-fine sequence is not required every time.
Can Beginners Use a Nail Drill on Natural Nails?
Yes, when a nail product calls for light surface preparation and the bit is made for natural nails. Routine trimming does not require a drill. Practice first and stop if the nail feels hot or sensitive.
What Speed Should a Beginner Start With?
Start slowly with the bit away from the nail, then test short passes on a practice tip. Increase speed only if the task calls for it and control remains steady. No single RPM suits every bit and material.